Pumpkin Cheesecake Cookies and a Princess Jasmine Cake
Back when I was dating my husband, I told some of my co-workers that he loves pumpkin pie. One of my co-workers brought me in a recipe she cut out of a magazine for Pumpkin Cheesecake Cookies. I have no idea what magazine she got this from, but it is a great recipe. I’ve made these cookies a few times over the years and they always turn out well.
Pumpkin Cheesecake Cookies
1 (8 oz) brick cream cheese, soft
1/2 cup butter, soft
1 cup sugar
1/2 cup pumpkin
1 egg
1/2 tsp vanilla extract
1 cup flour
1 cup cake flour (or 1 cup of all purpose flour and 2 tbsp cornstarch)
1/2 tsp baking powder
1/2 tsp salt
1/2 tsp pumpkin pie spice
Preheat oven to 350 degrees.
In a large bowl, beat cream cheese and butter together until smooth and creamy. Beat in sugar, pumpkin, vanilla extract and egg.
In another bowl, combine flours, baking powder, salt, and pumpkin pie spice.
Mix dry ingredients into wet ingredients. Place dough in refrigerator for 20 minutes.
On a cookie sheet lined with parchment paper place large scoops of dough. An ice cream scooper would be ideal, but you can use two spoons to place heaping spoonfuls down.
Bake for 10-12 minutes. Let cool for 2-3 minutes before transferring to a wire rack. Let cool before eating.
There is a maple glaze for this cookie recipe, but I have never actually made the glaze. I’ll include the glaze recipe for anyone who wants to try it, but the cookies are good without it.
Maple Cream Cheese Glaze
4 oz cream cheese, soft
1/2 cup powdered sugar
1/2 tsp vanilla extract
3 tbs real maple syrup
3-4 tbsp milk
Beat cream cheese until smooth then add powdered sugar, vanilla, maple syrup and milk. Add milk until you get desired consistency for glaze. Drizzle on top of pumpkin cheesecake cookies.
Princess Jasmine Cake
My daughter loves princesses right now, and her favorite is Princess Jasmine from Aladdin. She absolutely adores Jasmine. She is even going to be Jasmine for Halloween this year. We’ve had the costume for a few months now.
Kayla has seen all of the Disney princess movies and read various princess books, and Jasmine remains her favorite. Since we’ll be celebrating Kayla’s 3rd birthday at Disney World, I inquired about Jasmine cakes. Apparently, Princess Jasmine cakes are not one of their standard cakes. Not even at Cinderella’s Royal Table, where they make various princess cakes.
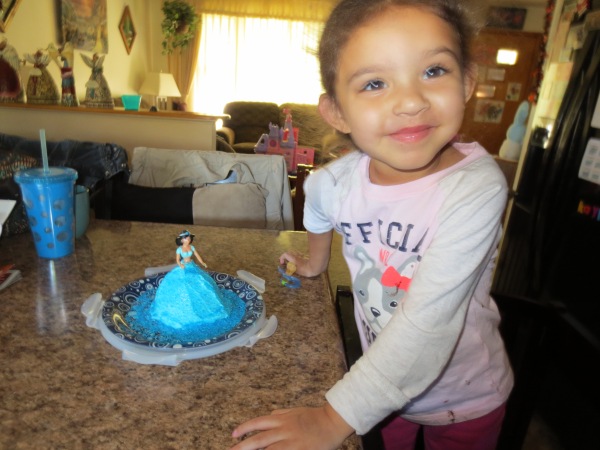
Instead of trying to convince a pastry chef at Disney World to make a special cake for my daughter, that would probably cost a small fortune, I decided to make my own mini Princess Jasmine cake. I ordered a cake mold pan and decided to use one of Kayla’s Jasmine figurines for the center of the cake.
At first, I had grand ideas of how I would decorate it. In the end, it was a simply decorated cake because I was short on time and my daughter was getting restless waiting for me to get done in the kitchen.
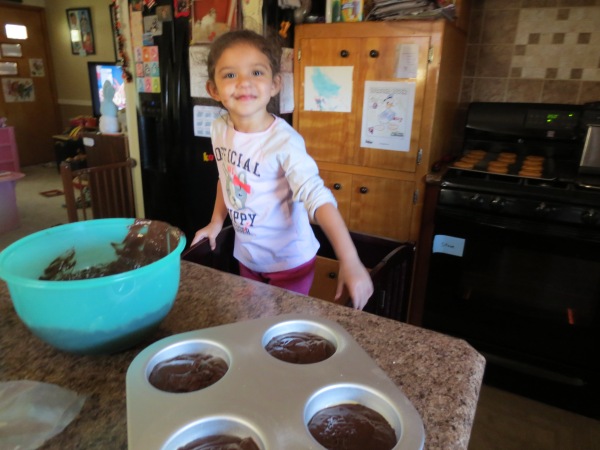
Kayla helped me make the batter for a basic chocolate cake and bake it in the oven. Once the cake was cool, I sent her out of the kitchen to go play. I quickly decorated the cake using one of her Jasmine figurines, buttercream frosting that I tinted sky blue, and blue edible sparkles/glitter.
When I showed the finished cake to Kayla, she was surprised and happy. She thought it was pretty, even without all the details I didn’t get to do. All she cared about was that it was her favorite princess, and that the cake sparkled. Kayla had fun licking the sparkles off the cake. She couldn’t wait to tell grandma that mommy made her a Jasmine cake (for her birthday…a month early). She spent a few days looking at it and eating it slowly. She wanted to show her friends her special cake. I was happy that she was happy. That’s really all that mattered to me. 🙂
Countdown to Disney World Chart – A creative visual display
Countdown to Disney World Chart – A creative visual display.
Check out my post on my other blog. It’s a great idea for a countdown to Disney chart/board to help kids understand how many more days are left until you leave on your vacation. This idea can be applied to any upcoming vacations, events, holidays. Enjoy!
Healthy Banana Ice Cream – Vitamix Blender Recipe
Okay, so this is going to be the easiest banana ice cream recipe you have ever seen. Seriously, it is so easy my toddler could probably do it. There is only one ingredient. I’m not kidding. All you need is bananas (and a strong blender).
Banana Ice Cream Recipe
– Frozen bananas
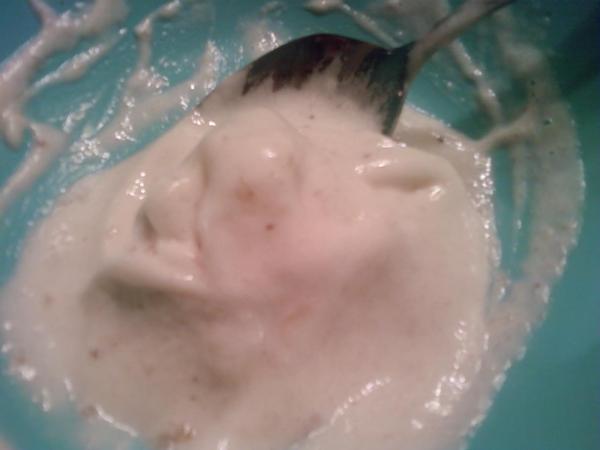
This is as healthy as ice cream can get. There is nothing else added. All you have to do is peel a couple of bananas. But them in a freezer safe container and freeze them for 2-4 hours. Take them out of the freezer and let them sit on the counter for about 5 minutes. I wouldn’t let them sit out for longer than 10 minutes. Put them in your Vitamix (or other high powered) blender on Variable 2 or 3 and blend for 30 seconds to a minute. All you want to do is blend it until it becomes the creamy consistency of ice cream or custard. It will become very creamy. This is a cold, refreshing treat on a warm day. It tastes like you made homemade banana ice cream, but without any added ingredients. This is super healthy, and kids love it.
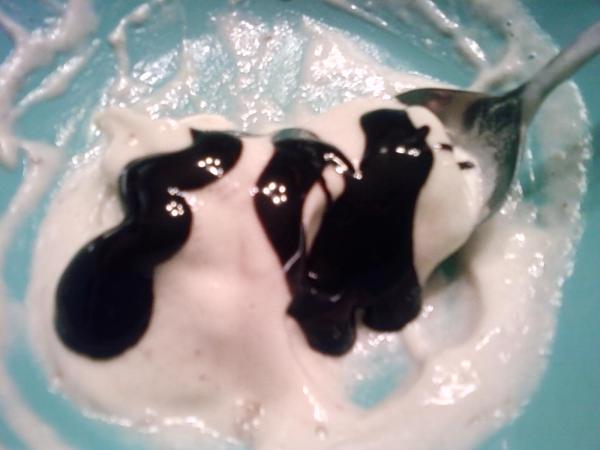
This is really just the base of the recipe. You can add other frozen fruit to the blender to make different types of ice cream. Try frozen strawberries to make a strawberry banana ice cream. My daughter likes when I add peanut butter to it and make a peanut butter banana ice cream. You can also add your favorite toppings. I like mine with dark chocolate syrup. Yum! Of course, adding a special topping may make it a little less healthy, but considering the fat and calories you are saving by not making this with cream, sugar, and eggs…I think you can allow yourself to add something special on top. Maybe some caramel and/or crushed nuts. When you’re making the ice cream, try adding some oreo cookies to the blender for a take on cookies and cream ice cream. There are so many combinations you can use to make this delicious, healthy treat.
My recommendations are to always use frozen bananas as your base, and if you are adding other fruit you should freeze it first. Other ingredients you may add to the blender don’t need to be frozen, such as oreos and peanut butter. Have fun with this recipe, and let your kids help make this with you. They will love being able to get involved and help make their own ice cream creations. And it’s so good that they won’t miss the “real” thing. Enjoy!
Cream of Mushroom Pork Chops and Green Beans (Ninja 3-in-1 Cooking System recipe)
Life has been crazy, and I’ve been a bad blogger lately. I haven’t been able to keep up with writing posts. I’ve cooked plenty of food over the last month, but either haven’t been able to find the time to take pictures or I can’t find the time to sit down and type of a post. I know, I am a horrible slacker. I guess this is what happens when life gets in the way. I currently have a 2-year-old with a cold, a basement that is a disaster area due to the two leaks we had from all the rain we got in the midwest, and I’ve been taking my daughter (prior to her getting sick) to various activities. Oh, and did I mention that there is a huge box with a swing set inside on my side of the garage, so I have to climb in through my passenger side to get into my car? Yeah, like I said, life has been crazy.
My goal is to get back to blogging. Even if it means staying up a little later in order to get a post done. So here’s to working toward my goal.
Cream of Mushroom Pork Chops and Green Beans Recipe
– 1 can Cream of Mushroom Soup
– 1 cup water
– 1 package boneless Pork Chops (my package had about 8 large pork chops.)
– 1 can cut Green Beans
– Salt and Pepper to taste
This is a super simple crockpot/slow cooker recipe. (I used my Ninja 3-in-1 Cooking System.) There really is no prep work involved. Turn your slow cooker on high. Pour the can of Cream of Mushroom soup and a cup of water into the slow cooker. Season the pork chops with salt and pepper. Place pork chops into the slow cooker. Add the can of green beans. Cover and cook for 5 hours.
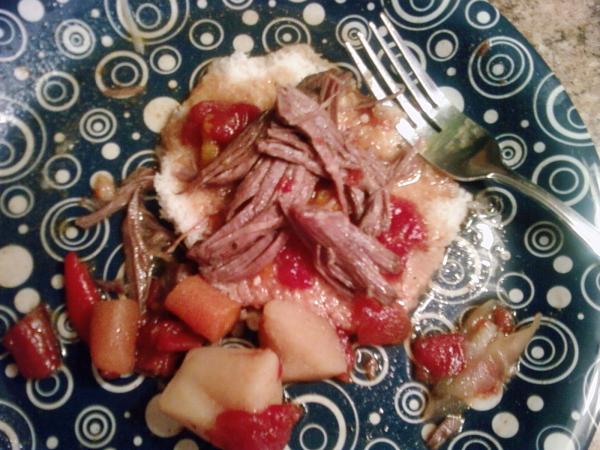
The pork chops will be tender and will pretty much fall apart. You will not need a knife to cut into these chops. I like to serve this over a piece of bread. I put a slice of bread on a plate, spoon some of the liquid (sauce) from the slow cooker onto the bread, then add the pork chops and green beans on top. This is a great meal for a chilly, rainy day.
Salted Caramel Chocolate Nests
I hope everyone had a great Easter Sunday. Mine was a bit more relaxed than last year. I hosted Easter brunch last year at my house. This year, my sister said she would host as long as I agreed to bake a couple casseroles to bring over. I made two casseroles from last year (see my old blog posts for the recipes), my french toast casserole and my ham, bacon and egg hash brown casserole. I prepared them the night before so all I had to do this morning was pop them in the oven, then take them over to my sister’s house once they were done. But since I can’t seem to just sit back and relax on a holiday, I decided to make salted caramel chocolate nests. I got the recipe from QVC’s host David Venable. You can find the original recipe at: http://www.qvc.com/SaltedCaramelChocolateNests.content.html
It’s a very simple recipe, but it is very messy to make, so be forewarned. The end result is worth the sticky fingers. It is the perfect mix of salty and sweet. My husband didn’t think the ingredients went together until he tried the end product. It’s quite tasty.
Salted Caramel Chocolate Nests Recipe
12 oz vanilla caramels, chopped
1/4 tsp salt
3 Tbsp milk
6.5 oz potato sticks
8 oz semisweet chocolate chips
Jelly beans or chocolate eggs for decoration (optional)
I (not quite) doubled the recipe so I could make more nests. I wanted to make sure we’d have enough to eat for a few days. I used one full 14 oz. bag of caramels and 1/3rd of a second bag. It was very caramel-y, so I don’t think I needed any more. I added just a little bit more milk and kept the same amount of salt. I used 2/3rds of a can of potato sticks. The original recipe says it only makes 6-8 nests. I just didn’t think that was enough. I also made bigger nests for the adults, and smaller ones for my daughter. Feel free to make your own changes and adjustments as you see fit.
Line a baking pan with parchment paper and lightly spray the paper with cooking spray. This is an important step to make sure that the nests don’t stick. Set the pan aside.
Place the chopped vanilla caramels, salt, and milk in a microwave-safe bowl. I only chopped the caramels in half to save time. They still melt just fine. Microwave in 30 second intervals and stir after each interval until the caramels are completely melted and the mixture is smooth. (This may take up to 2-1/2 minutes.) Let the mixture cool for 30 seconds.
Carefully stir the potato sticks into the caramel mixture until completely coated. The original directions say to rub your hands with oil and form 6-8 uneven circles and place them onto the prepared baking pan. I tried rubbing my hands with oil, but these were so sticky that I was unable to form them into circles. It just stuck to my hands. Instead, I used a big spoon to scoop some of the mixture out of the bowl, then placed it onto the baking pan to form the circle. This was much easier and less messy. Use one or two fingers (or the back of a spoon) and press the middles down, creating a nest-like shape.
Refrigerate the nests for 35-40 minutes, or until the caramel has hardened. I put the nests in the fridge for a few hours and they still weren’t really hardened. It may be a good idea to pop them in the freezer for a bit if you want them to harden well.
While the nests are in the refrigerator, melt the chocolate chips on top of a double boiler. Or you can melt the chocolate in the microwave in 30 second intervals. Dip the bottoms of the nests into the melted chocolate, and then place the nests back onto the prepared baking pan. Refrigerate for 20 minutes or until the chocolate has hardened.
Once the chocolate hardens, the chocolate will help hold the nests together better. If you want to complete the nest, add some jelly beans or chocolate coated chocolate eggs to the top. This makes them look super cute, and adds a festive feel to them.
Mine didn’t come out quite as cute as the ones from the recipe picture, but I also had a two-year-old helping me do it. I’m sure that makes a difference.
These treats are definitely good, even if they are a little messy to make. Be prepared to lick caramel off your hands when you’re done. Happy Easter!
Awesome! Super Sweet Bloggers Award
I’d like to give a big thanks to La Petite Gourmande Anglaise (http://petitegourmandeanglaise.com/) for nominating me for the Super Sweet Bloggers Award. If you haven’t seen her blog before, please check it out. She’ll take you on an adventure of French Cuisine with recipes for beignets, creme brulee, and meat stuffed crepes. I’m personally a fan of all types of crepes, so she won me over with her meat stuffed crepes recipe.
The rules of the award are: 1. Visit and thank the blogger(s) who nominated you. 2. Acknowledge that blogger on your blog and link back. 3. Answer the “Super Sweet” questions. 4. Nominate a “Baker’s Dozen” (13) blogs for the award, add a link to their blogs in your post, and notify them on their blogs. 5. Copy and paste the award on your blog somewhere.
The Super Sweet Questions (and my answers) are:
1. Cookies or Cake? Cookies. My daughter would definitely go with cake, but I think I prefer a nice warm cookie right out of the oven. Yum!
2. Chocolate or Vanilla? Chocolate wins hands down. Not even a contest. But I do enjoy putting French Vanilla ice cream over a warm brownie.
3. What is your favorite sweet treat? Pie. Some of my favorites are banana cream, key lime, and custard. I love pie from Baker’s Square.
4. When do you crave sweet things the most? When I’m stressed out. I’m usually a salty food person, but sweets calm me.
5. If you had a sweet nickname, what would it be? Ummm…Sugar Mama? That’s the best I can come up with off the top of my head.
My nominees are (in no particular order):
Domestic Diva, M.D. – http://domesticdivamd.com/
Homemade Delish – http://homemadedelish.com/
The Messy Baker – http://themessybakerblog.com/
Kolpona Cuisine – http://kolpona.com/
Savory Simple – http://www.savorysimple.net/
Local Kitchen – http://localkitchenblog.com/
Frugal Feeding – http://frugalfeeding.com/
Baking with Basil – http://bakingwithbasil.com/
Cozy Apron – http://thecozyapron.com/
Homemade with Mess – http://homemadewithmess.wordpress.com/
Kel’s Cafe of All Things Food – http://kelleychisholm.com/
The Paddington Foodie – http://thepaddingtonfoodie.com/
Cupcakepedia – http://cupcakepedia.wordpress.com/
A hot breakfast to start the day – Homemade Coco Wheats
 When I was little, I wasn’t into the sugary cereals. My mom rarely bought them, and when I convinced her to buy me just one box, I usually didn’t like it. It just didn’t appeal to me. By the time I was in junior high, I was eating cereals like Basic Four, which was odd for a kid my age.
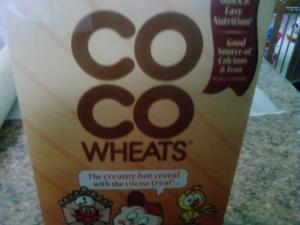
In my house, we ate a lot of hot breakfasts. My mom would make scrambled eggs, bacon, sausage, and biscuits. I loved omelettes, and thought it was a treat when she’d make skillet potatoes. Yum! One of my favorite breakfast treats was Coco Wheats. Not everyone appreciates a nice warm bowl of this chocolate treat, but it’s something I have fond memories of as a kid. I still indulge in the occasional bowl, but not very often.
If you don’t want to buy a box of Coco Wheats, you can always make your own. It’s very simple.
Coco Wheats Recipes
2 cups water
2 – 2 1/2 tablespoons cocoa powder
1 teaspoon vanilla extract
1/2 teaspoon cinnamon
1 teaspoon almond extract
1/3 – 1/2 cup farina/cream of wheat
1 pinch of salt
1 tablespoon milk
1 tablespoon sugar or brown sugar
1/2 tablespoon butter (optional)
1. Whisk the cocoa powder into the water in a pot.
2. Heat the water over medium heat until boiling. Add in cinnamon, vanilla extract, almond extract, and salt. Whisk together.
3. Add in farina/cream of wheat slowly and stir constantly for 2-3 minutes. This will prevent lumps. (Add in farina/cream of wheat to your desired thickness.)
4. Turn off heat and cover with lid. Let sit a few minutes.
5. Uncover. Stir in milk, sugar, and butter. I like to add just a little milk at the end to make it creamy.
This is a nice homemade morning treat. Some kids that don’t like the boxed version prefer this homemade version. If you don’t like using sugar or brown sugar, you can use honey to sweeten it up a bit. And you can always skip the butter all together. My mom always made ours with milk, sugar, and butter…so that’s how I always eat mine. I hope you enjoy this recipe as much as I do.
A good breakfast
With Spring and Summer quickly approaching, I’ve been trying hard to start eating a little healthier again. No, this doesn’t mean that every meal I eat will be healthy. It just means that I will eat non-healthy things in moderation, and try to incorporate healthier foods into my meals. One of the things I love to add to my daily meals are smoothies. They are healthy, refreshing, and they are something that my daughter has no issues drinking. The options for smoothies are endless. You can be as creative as you want, or keep things super simple. It’s a great way to start off any day of the week. In addition to smoothies, I am trying to find recipes for hot (and healthy) breakfast meals for my family. I’ve come across a few recipes that I am planning to try out this week. I hope you all will join me this week on my hot breakfast adventure. Stay tuned.
P.S. I will also be doing a couple recipes using my Ninja Cooking System this week. It’s going to be a busy week in my kitchen.
Cooking with my Ninja
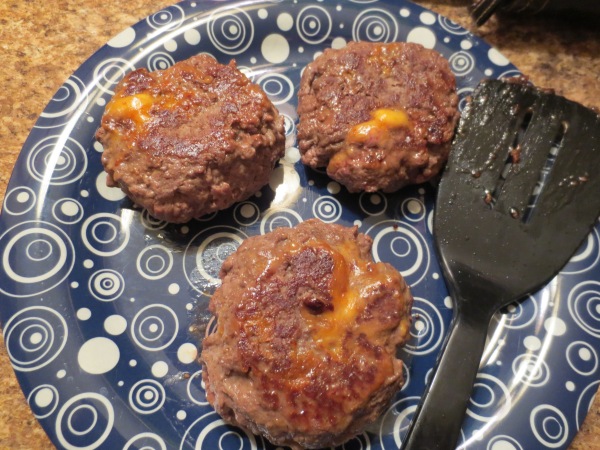
Over the past week, I’ve been cooking up a storm in my Ninja 3-in-1 Cooking System. I’ve made cheddar stuffed hamburgers, pot roast, mini chocolate peanut butter cupcakes, pork chops, creamy potato soup, and vegetable beef soup. Everything has come out amazing so far. I am completely happy with my Ninja. Right now, I probably like my Ninja better than my husband. (My Ninja doesn’t give me attitude after a hard day of work.) This is one kitchen appliance investment that I am completely satisfied with, and would recommend to others.
I currently don’t have the time to do a recipe post, but I will put up a few quick pictures of some of the stuff I’ve made recently. Enjoy!
Easiest Spaghetti and Meatballs Recipe – Using my Ninja 3-in-1 Cooking System
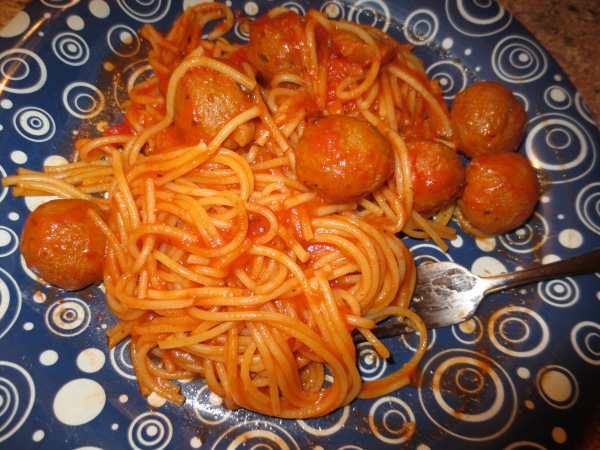
This is my third post with a recipe using my new Ninja 3-in-1 Cooking System. I am still on a quest to try out various recipes from the cookbook that came with my Ninja. This recipe is listed under the 30 minute meals section. I really wasn’t expecting to be impressed since making regular spaghetti isn’t that hard. You boil pasta, drain it, add sauce and meatballs, and you’re done. No big deal. Simple. But somehow this easy recipe from the cookbook managed to impress me. And it doesn’t even use fresh meatballs. The recipe calls for frozen meatballs. (Even though you can easily do this with fresh ones, if you want.)
The recipe has only four ingredients. You put them in the cooking pot, set the unit to oven, and let it cook for 25-30 minutes. When you take the cover off, you have this delicious spaghetti dinner that took no effort. Seriously, it takes very little effort to make this. If you have older kids, they can make this meal for the family with no problems.
Easy Spaghetti and Meatballs Recipe
– 4 cups water
– 1 lb uncooked spaghetti noddles, broken in half (Or just put them in whole.)
– 1 jar pasta sauce
– 1 package (24 oz.) frozen meatballs
Pour 4 cups water into pot. (I used 4 1/4 cups because the pasta soaks up all the water and I didn’t want it to burn.) Stir in spaghetti, sauce, and meatballs. (The recipe says to break spaghetti in half, but I put it in whole.) Put unit on OVEN at 300°F for 25 minutes. (I suggest 30 minutes. When I checked at 25 minutes, not all of the pasta was tender yet.) Cover and cook until pasta is tender and meatballs are hot, stirring occasionally. NOTE: When using thinner sauces, use 3¾ cup water. For whole grain and thicker pastas, increase cooking time by 2–4 minutes, or until pasta is tender. Serve immediately.
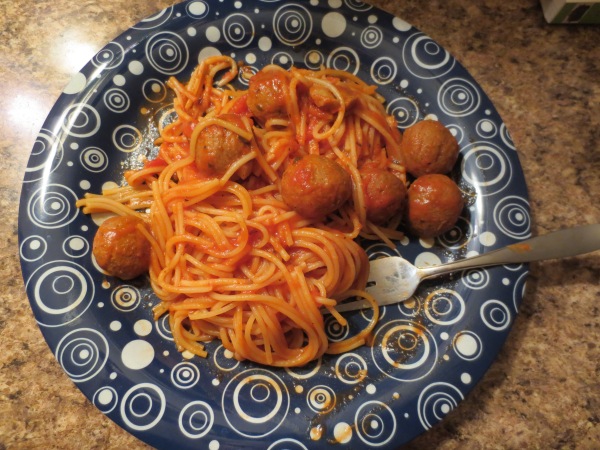
That is literally all it takes to make this meal. I let my Ninja pre-heat while I got my ingredients out. I added the water to the pot and put the spaghetti noodles in without breaking them in half. I put a little sauce directly on top of the noodles, then added the turkey meatballs, and covered the meatballs with the remaining sauce. I stirred it all together, just a little bit, then covered. It is important to stir this at least once during cooking to make sure the pasta is cooking evenly and isn’t sticking together. Other than that, there is nothing else for you to do. Just sit back and let it cook.
There is no need to drain any water. The pasta soaks up all the water. The spaghetti noodles are infused with the pasta sauce. I was a little surprised with how well it turned out, even with frozen meatballs. I think my daughter said it best when she said, “mmmm…yummy!” Yes, it was quite yummy.
This is a wonderful 30 minute recipe for busy people. As a mother of a toddler, I appreciate fast and easy meals. It is crazy how my days can fly by without warning. At least once a week, I end up needing to make dinner in a hurry. I will be adding this recipe to my list of go-to recipes when I need to make something fast.
Note: You can make this recipe in a regular slow cooker, but it will take longer than 30 minutes and you will have to watch closely to make sure it doesn’t burn.


